
It's been a while since I have posted anything but I'm telling you I have been B-U-S-Y. Besides normal motherly and wifely duties, we have been potty training the twins and I have been running around like a chicken with it's head cut off getting ready for this craft show coming up. I did find out the other day that we have a perfect booth placement!. We will be one of the first booths people see when they walk in the gate! So, if you are here in Georgia, come down and see us at the Hatch Market in Griffin, GA, May 9th and 10th!
Ok, on to machine quilting. I think there is a big stigma around machine quilting. People tend to think it is difficult or requires a fancy machine, when in truth, the machine you already have will probably work and learning to quilt is no more difficult than learning to sew. It just takes practice!
I would like to pose a disclaimer: This is the way that I quilt. There are dozens of different ways to accomplish machine quilting, and some may be better and more elaborate than the way that I do it.
I am also assuming that you already know how to work your machine and that you have basic knowledge on sewing in general.
There are a few special things that you will need in order to get started:
- Darning foot for your machine ( and either a darning plate or the ability to drop the feed dogs)
- Quilting or Microtex Sharp Needles - size 90/14 or smaller
- Quilting Spray Baste ( yes, its a spray adhesive. It washes out and won't harm the quilt not to mention make your life much easier)
- Safety Pins
- 100% Cotton Thread ( get the good stuff!!!!!!!!)
- Low Loft batting - I use a 80/20 cotton/polyester blend batting. It doesn't shrink much during washing and won't dull the needle as fast as a polyester batting.
- Something to quilt - start small. I recommend just using some fat quarters to practice on before you move on to quilting actual blankets.
- Quilting gloves - If you don't want to make the investment right away, I recommend using those yellow kitchen gloves instead of the quilting gloves.
- A large sewing extension table or sewing cabinet to work on.
Prep-ing the quilt:First thing you need to do is make sure that your quilt top and quilt back has been well pressed. Also, throw your batting in the dryer for 10-15 minutes in order to get rid of any wrinkles.

Then, find yourself nice large space to spread your quilt out. Lay down the quilt back, right side down, and smooth out any wrinkles and secure so that the fabric stays nice and taut. Following the directions on the can, lightly spray the quilt back with Quilting Spray Baste. Then, starting from the center, lay batting on top of quilt back. Smooth out any wrinkles and adjust accordingly. Then lightly spray batting and then lay quilt top on to batting, being careful to smooth out any wrinkles. If you have a baby quilt size or larger, secure the quilt sandwich with safety pins in order to insure no shifting.

Okay! Now we are ready to quilt!
Get your machine ready:Make a small quilt sandwich in order to adjust tension for your machine.
Put the darning foot on and attach the darning plate and/or drop feed dogs. Set your Stitch Length to "0". Insert your needle and thread your machine.
If you are doing a larger piece, make sure you have a couple of full bobbins before you start.
Place your small quilt sandwich in the machine and lower your foot. Don your quilting gloves and get ready!
Free- Motion Quilting:Your hands should be fairly close to the foot while you work. Start your machine and move the quilt sandwich around ( in no particular pattern right now). Adjust your tension so that neither the top or bottom thread is being pulled too much.

After your tension is adjusted correctly, Slide the quilt sandwich you are working on in the machine and drop your foot. Starting at the edge, run a couple of stitches back and forth on the sandwich to lock the thread in place.

Pull taut and cut the thread tails! Then begin "drawing" a meandering path with your needle. This is called STIPPLING.

Try not to overlap your lines, and try to keep your stitches as even as possible. Don't be afraid to put a little speed on the machine. Go too slow and your stitches will be too long, go too fast and the quilt sandwich will get away from you. Also don't be afraid to stop and adjust your hand placement or turn the quilt around. Just make sure that the needle is DOWN! The quilt should move around fairly easy. If not, make sure that you have bunch up the quilt around the machine so that the weight of the quilt isn't working against you. Also, make sure you are giving the machine some gas. If you are "drawing" faster than your machine is sewing you will create a lot of pull.
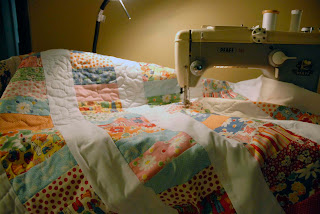
When you are done, simply lock the stitches in place , pull the thread tails taut and snip the thread tails!

Basically, that's it. From here on out it just takes lots of practice. Feel free to experiment with different patterns. Another really simple, but effective one, is LOOPS. Simply "draw" loops instead of a meandering line. Variations of this can be hearts, flowers, or even stars! If you would like to see all of this in action, I recommend buying the
Patsy Thompson: Fast and Free machine quilting DVD. It's a great tool to get you started!
Good Luck and Have Fun!!!


